I received free Werther’s Original® Baking Caramels in order to host the Werther’s Original® sponsored party. The opinions expressed here are my own.
I signed up for this particular sponsored party for a few reasons:
- I love Werther’s.
- It’s Fall
- I knew my Girl Scouts would provide honest feedback that I could provide to my readers.
- But most important (to me) — my Girl Scouts would have fun making something at our Fall party that was edible and fit the theme.
Knowing that we had a Fall party scheduled I felt it was more than appropriate to put the new Werther’s Original® Baking Caramels to the ultimate test. Beings it was a Fall party and the girls are younger, I needed something that was easy for them to make that represented the season best. So, candy covered apples seemed to be the perfect fit!
The only problem was, I wasn’t quite sure how I was going to pull it off as we don’t have access to a microwave at our meeting location, and the recipe for making the candy covered apples called for the use of a microwave (you read that correctly — no stove; a microwave) so I had to take a chance with the recipe provided with my kit. See below for the simple addition to the directions provided.
So I notified the parents of my plan of making them and that I had received the product for free (yes, I even disclose things offline as well lol) from Werther’s.
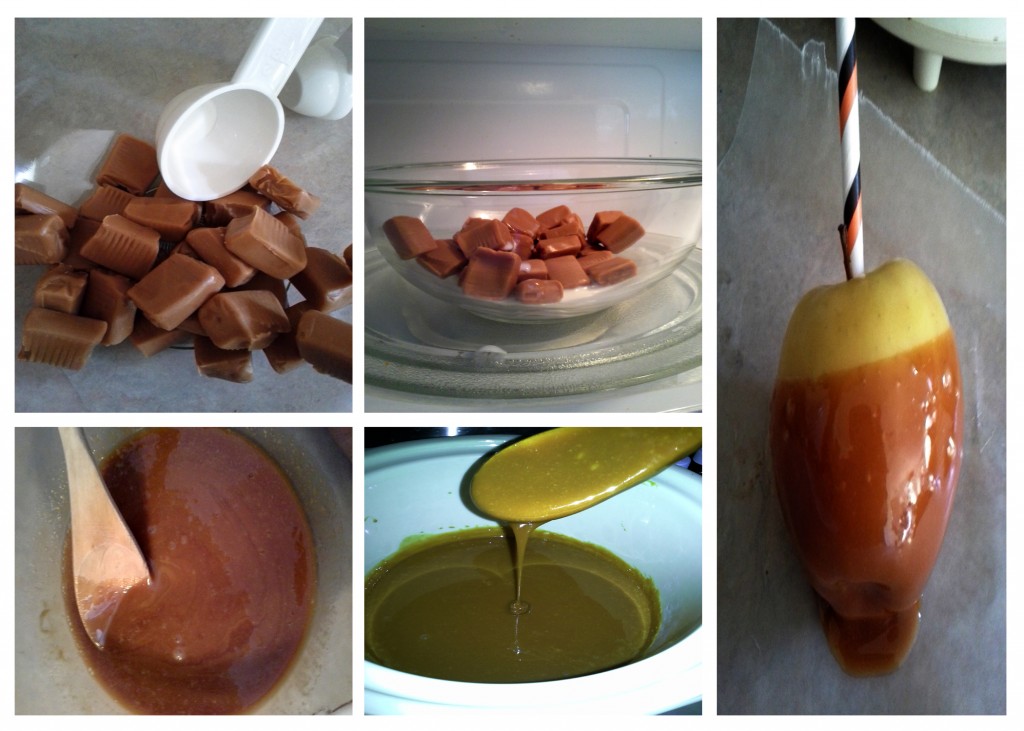
Following the directions I prepped the caramel at home; it was easy! You use 1 bag of Werther’s Original® Baking Caramels per 4 medium sized apples. So I unwrapped the caramels (also easy; they’re in a wax-coated paper – it took me 3 minutes per bag), placed them in a medium sized glass bowl, added 2 tablespoons of milk and microwaved them for 2 minutes. I completed this step until I had enough caramel made for 24 apples (per the directions provided on the bag). When I removed the melted caramel from the microwave I simply stirred it and the caramel became creamy…and it smelled delicious. Oh boy did it smell delicious! I’ll cover the taste of it a little later on.
This is where I had to change things up from the directions a bit in order to keep the caramel warm and insure it didn’t set before I left for the party. I simply added each bowl made and transferred it to a crockpot with the setting on low. I stirred it about every 20-30 minutes and it worked out perfectly! The caramel stayed warm in the crockpot and the girls were able to dip their apples into it…3 hours later…with no problems whatsoever.
I did test a candy covered apple after I melted the caramel at home. I figure this much… I had never made my own and I was dying to know what they tasted like. I love candy covered apples and if you know me, you know it’s clearly one of my favorite things about the Fall season. Plus, someone had to make sure it tasted as good as it smelled; right? 😉
So to further follow the directions, I dipped my apple in, set it on wax paper for 15 minutes and with the first bite my mouth was exploding with flavor. It was phenomenal! I couldn’t wait to get to the party and have the girls make them.
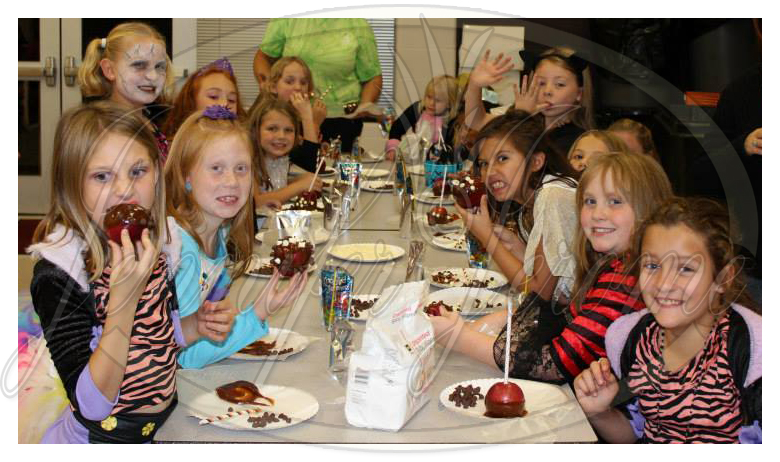
 20 minutes into the party and I had a long line of kiddo’s making their first candy covered apples. I’ll admit it, I was excited for them. While I never made candy covered apples on my own, I have a distinct recollection of making them (dunking my apple) one year while in elementary school.
When all the girls had taken their turn we had them set them on the snack table until the end of the party. About 15 minutes toward the end I had them sit down and gave them options of chocolate chips or white chocolate chips.
It was fun to see some of them just roll them around in the chips and let them stick where they may, while others were more meticulous or crafty (even making faces with them).

Thank you Werther’s!
In the end a lot of the girls gave me positive feedback in regard to the taste of them (and the fun in making them). Only a couple of girls said they preferred the taste of plain apples, but also let me know how much they enjoyed making them regardless. One of them even offered hers up to my husband who was more than happy to oblige. I haven’t seen him smile like that in a long time…nor commit me so fast into making more at home!
All in all, my general consensus is this: I use to avoid using caramel in recipes because it always seemed like it would create a huge mess and be difficult to work with. After this experience I’m already scouting out the next available recipe that I can use them with. The holidays are coming…I have plans! Creamy, delicious plans.
If you’d like to make plans of your own, please check out the Werther’s Caramel Community for caramel lovers (just like you…and me!) that is full of recipes, coupons and even sweepstakes.
This is the baking caramel we’ve been waiting for!
I received free Werther’s Original® Baking Caramels in order to host the Werther’s Original® sponsored party. The opinions expressed here are my own.


